How To Paint New Plaster Walls And Ceilings?
Do you wish to start your new plaster painting projects as a DIY enthusiast? Painting new plaster walls and ceilings by yourself appears to be an easy task. It’ll give your home a whole new look.
However, if you don’t mix the paint coats properly or follow the process, this can be pretty difficult. First, wait for 3 to 4 weeks to thoroughly dry the plaster before painting it. Next, seal the wall and ceiling with a mist coat, then apply a top layer of water-based wall paint.
When you don’t follow the procedure correctly, the paintings on your walls and ceilings may crack, peel off, or even stain terribly. So here’s a step-by-step instruction with all the information you need: Painting New Plaster Walls And Ceilings.
How To Paint New Plaster Walls And Ceilings?
Do you wish to restore your house and paint the new plaster? According to paintcentric – painting is a growing trade, as many painters use their skills to supplement their income from painting. So, if you want to give your home a professional touch, you can employ a pro painter. On the other hand, painting new plaster is a simple activity that you can complete independently. Here are some guidelines for painting new plaster walls and ceilings.
Prepare All Painting Supplies in Advance
Though many people recommend fancy primers and tools, using these are not mandatory. Instead, here are some typical products that you can find easily and use for every painting project:
Water
Dust Sheets
Sand Paper
Paint tray
Decorator’s Tape or Masking Tape
Topcoat Paint
Paintbrush or Roller
In Case of Imperfections Sand the Plaster First
If you go ahead and paint in a hurry, then the final results come out with some scratches and lumps on your wall. Look at your ceiling and wall surfaces to see if they are harsh or smooth. If the surface is smooth when you touch it, it’s ready for priming.
Otherwise, if you see any uneven patches or bumps on the surface, then remove them using 120-180 grit sandpaper. Put on your dust mask, remove the dust from the walls and use the masking tape on the corners.
- Sealing and Priming New Plaster
This is the first step that you need to follow before starting to paint on the fresh plaster walls and ceilings:
- Let the Plaster Dry
Before putting anything on your fresh plaster, ensure that they dry completely. Let it sit for 3-4 weeks until the plaster is in a light and uniform colour. However, the drying period depends on many elements. But the best way of understanding it is that if there are any dark watermarks on the plaster, it’ll take more time.
- Plaster can dry within two weeks in warm weather, or it can be longer than six weeks in cool, humid weather. However, it also relies on the type of plaster you put on the wall or ceiling.
- A fresh plaster is dark, and it’ll be lighter when it dries out.
- Make a Mist Coat:
Matte emulsion paint is like water-based paint that you can use for any general purpose. These paints are available in all paint stores. Pour a 50/50 ratio of paint and water into a plastic bucket to make a mist coat. This ratio will ensure that the paint is wet enough to absorb into the plaster and seal it properly. Use a shade lighter than the colour you decide to paint.
- With this mist coat, you can make a base coat, and this will need fewer coats to get a solid finish on your fresh plaster.
- Mist coats will be cheaper than the paint you will use on top.
Tips: Don’t employ oil or vinyl-based paints to create the mist coat. These two will not bind the paint accurately and don’t allow the plaster to breathe.
- Put Down Dust Sheet & Cover Nearby Furniture
Cover your floor with a canvas or plastic dust sheet and remove all the furnishings. These will keep paint splatters from your floor and furniture. Suppose you can then move all the furniture out of the room. Place the large pieces in the middle of the room.
- Pour the Mist Coat Into a Paint Tray
Depending on the roller you’re using, use a 7-12 inch paint tray. Fill the paint tray with a mist coat until the container’s deeper section is full. For smaller walls or ceilings, use 7-inch rollers, while for larger walls, use 12-inch rollers. After considering everything, pick the roller you’re the most comfortable painting.
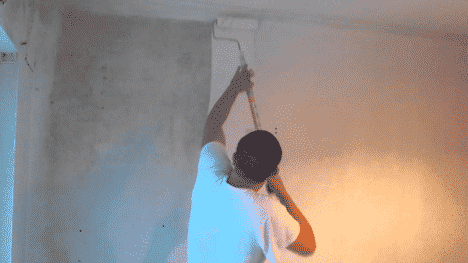
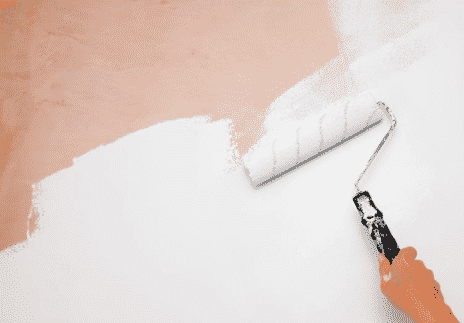
- Roll the Mist Coat Onto the Wall and Ceiling:
Dip your foam paint roller in the tray and roll an even amount of mist coat on the roller. Don’t wet the roller too much with the paint; just put an even layer and spread the paint onto the walls and ceilings.
Use long strokes on your wall from top to bottom. Work from left to right if you’re right-handed and right to left if you’re a lefty. This paint absorbs too much moisture and dries too quickly.
- Let the Mist Coat Dry
After putting the mist coat on the new plaster, it’ll dry within one hour. Though it depends on temperature before applying any topcoat, you need to allow it to try for 24 hours. Let the mist coat dry for a full day to be in the safe zone.
- Applying the Top Coats
After sealing and priming on your new plaster, 80% of the job is done. Now get ready for the final coat; here are the steps you need to follow-
- Start in the Top Corner:
If you’re a right-hander, begin from the top-left corner, and if you’re a left-hander, start from the top-right corner. When working in this direction with your dominant hand, this method will reduce the mess and prevent splashes.
- Use Paintbrush
Use a 4 inch paintbrush and paint from the top to bottom of the walls and ceilings. Paint in one direction in the horizontal corners where your walls meet the ceiling and floor.
- Use Roller
Now finish the rest of the plaster with a paint roller. Cover the top half of the area with vertical straight lines. After that, finish with the bottom. Keep an eye out for streaks or rough places on the walls while you’re working. To smooth off the uneven parts, roll over them.
- Allow the First Coat to Dry
Maximum first coats dry after 6 hours, but giving it a whole night will be the best option. It will be much more of a pro-looking coat of paint if you apply the second coat after allowing the first coat to dry completely. The patchy areas will be more visible when the first coat is dry. Also, it will make applying the second layer more manageable.
- Apply a Second Coat
Apply the second coat of paint in the same way as the first. Pay extra attention to regions that appear to be missing after the first coat. You’ll have even and smooth walls after the second application. It is critical to have a high-quality coat of paint at this point. However, some less expensive paints require more coats to gain the same level of finish.
- Let the Paint Dry
Before you’re going to put anything else on the walls, let it dry completely. Though most paint dries faster, letting the paint dry for 24 hours is safe. You wouldn’t need to do anything extra to your walls or ceilings at this point if you allowed your plaster to dry thoroughly. If you make any mistake, such as not allowing the plaster to dry completely, the topcoat will begin to flake over time.
Can You Paint Directly on New Plaster?
Experts advise adding some undercoat or thin base coat before painting on new plasters. You first need to seal the wall with a simple coat of the new plaster for the best outcome.
It’ll form a seal on the wall whenever you paint on damp plaster. If you do so, it’ll prevent the water in the plaster from naturally evaporating. Later this excess water reacts with the salts in bricks and causes damage to the wall and damp issues.
Wrapping Up
When you know what to do, these newly plastered walls/ceilings will require more preparation than regular walls. When it comes to painting your own home plaster, preparation is necessary for a successful outcome. Taking extra time and care with the fresh plasters before painting is well worth it.
You must carefully follow all the stages to achieve a proper and vivid finish. There is no other option except to wait for your fresh plaster to dry before applying any paint. Then follow all the processes according to the article we’ve been told.
Best Masonry Paint for Exterior Render and Brick and Stone

Thanks for the info